Windows 10 is one of the widely used operating system. If anyone asks about the complete OS, the first thing that pops into our mind is Windows 10. This operating has a complete set of features. After the installation of Windows, it is normal to get cumulative updates. These updates downloads and installs the latest security patches, performance and other improvement into the system. Updating the system is good but this does not work every time. Most of the users have faced problems like system lag, errors in the system after certain updates. You must have faced such errors as well. It affects the overall user experience. But you can get away from these easily by stopping automatic updates.
Table of Contents
How to stop Windows 10 automatic updates permanently?
Follow the instruction given below to block the automatic Windows update on your device,
Method 1: Disable Automatic Windows 10 update using Settings
- Click on the Windows (flag) icon and type settings or tap on the gear icon.
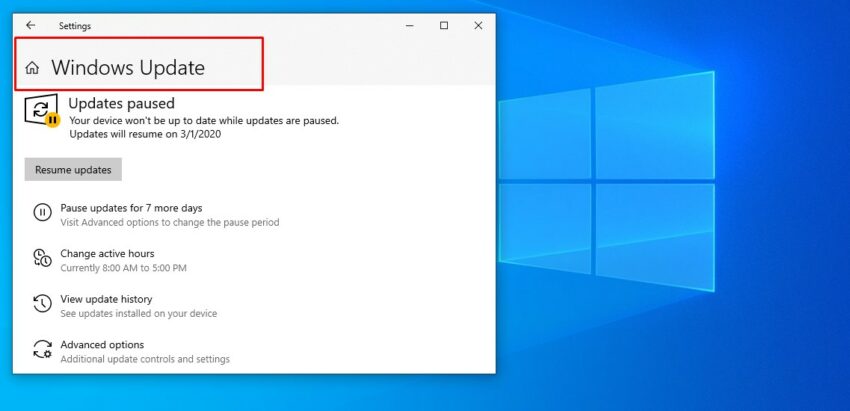
- Select ‘Updates and Security’. Go to Windows Update and tap on ‘Advanced Options’.

- Under the advanced options, there is the ‘Pause Update’ section. Select the date till you want to pause the Windows Update. This method will temporarily stop the windows update.
Method 2: Disable Windows Update Service
- Press Windows (flag) key + R for Run dialog.
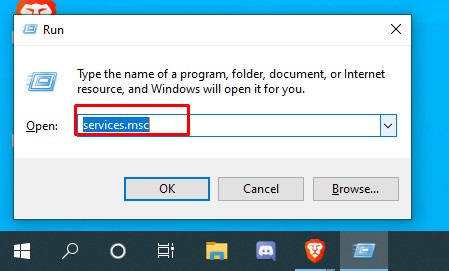
- Type services.msg and hit enter. This will open the services window.
- Under the services window, scroll down and you will see ‘Windows Update’, double click on it.
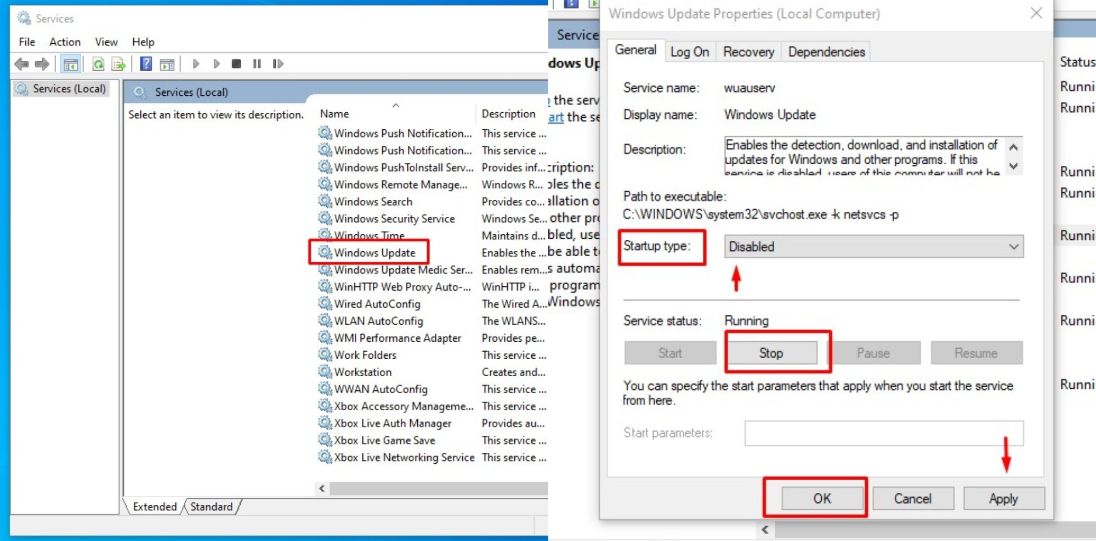
- ‘Windows Update Properties’ tab will appear. On the ‘Startup type’ section select ‘Disabled’ option. Then change ‘Service status’ to ‘Stop’.
- Click on Ok. Now you have to restart your computer for the change to take place.
Method 3: Using Group Policy
- Press Windows (flag) key + R for Run dialog.
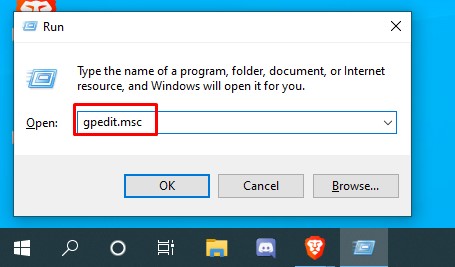
- Type ‘gpedit.msc’ and hit enter. This will launch the Group Policy Editor.
- Navigate the following path:
Computer Configuration\Administrative Templates\Windows Components\Windows Update
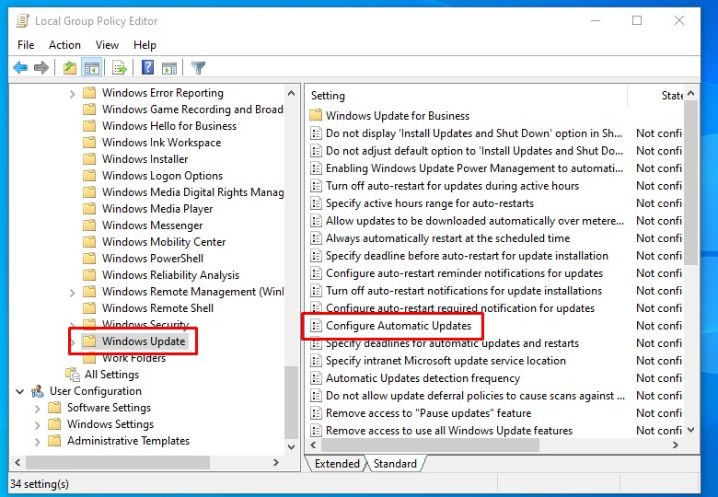
- On the right-hand side, select ‘Configure Automatic Updates’ and double click on it.
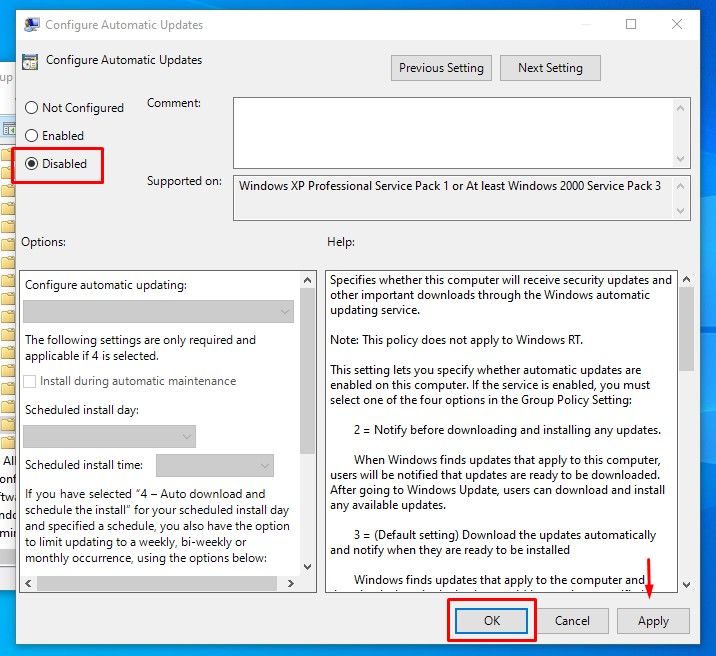
- On the following pop-up window select ‘Disabled’. Afterward, click on Apply then OK.
After the completion of these steps, Windows 10 will stop downloading updates automatically.
The above mentions three methods are the best ways to stop automatic Windows 10 Update on your device. However, the installation of the latest security patches are recommended. If there are issues in your system after the update you can restore your system.
Up in the line:
- Global IME Bank makes an agreement for partnership with Khalti for Digital Payments
- Samsung Galaxy Z Flip vs Motorola Razr: Which foldable phone is better?
- Samsung Galaxy Buds Plus is available in Nepal at Rs 17,000
- Is Samsung using a real foldable glass in Galaxy Z Flip?
- Samsung Galaxy S20 Ultra, the smartphone with 16GB RAM, 108MP camera & 100x zoom
More on Tutorials:
- Here’s how you can get a detailed report about your laptop’s battery in Windows 10
- Run Windows 10 Universal App easily with these commands
- How to install the same app multiple times on any Android without root?
- Find Wi-Fi Password of all connected networks on Windows 10 using CMD
- How to find/ check which Windows 10 build and version number you have?
- Here’s how you can enable mixed (Light and Dark) theme on Windows 10
- Here’s how you can take partial selective screenshots without rooting your device
- Find your Windows product key without installing third-party software