Here’s a summary of steps to hide drive using cmd:
- Run cmd as administrator
- Type ‘diskpart’ and press enter.
- Type ‘list volume’ and press enter.
- Type ‘select volume 2’ and press enter.
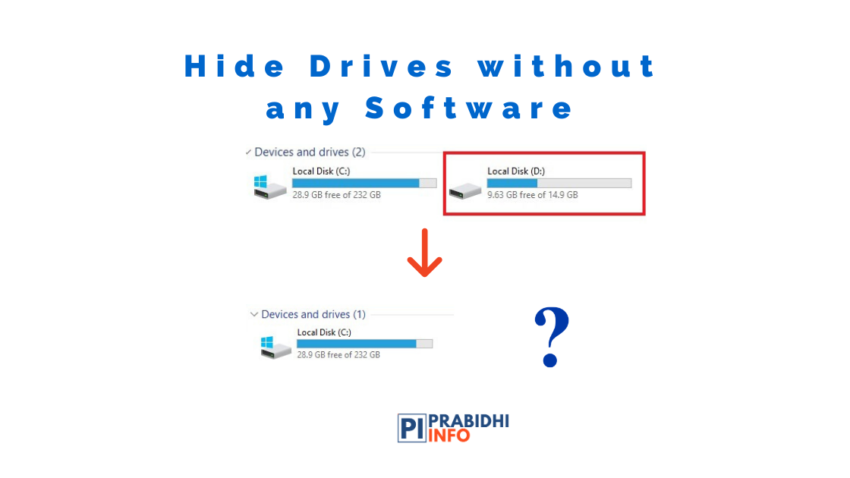
- Type ‘remove letter D’ and press enter. This will hide D drive.
Our personal laptop or PC has a lot of personal data and files. Privacy of the data matters to all of us. There are third-party apps that can hide data and files, but you can also hide them using the command prompt (cmd) and disk management without any hassle of downloading or installing other apps.
Command Prompt is a powerful command-line interpreter application used for executing different commands. It is officially called Windows Command Processor. The command lines you type are not case sensitive. Using cmd, you can do most of the action you do using GUI.
Disk Management is a built-in Microsoft utility tool for full management of the storage on your computer. Using Disk Management you are able to add a new drive, extend volume or shrink partition, assign drive letter, etc.
Table of Contents
How to hide drive using cmd?
First of all, keep all the data in the drive you want to hide then follow the given instructions.
STEP 1: Press the Windows (flag) key or click on start menu and type ‘cmd’. Right-click on command prompt and select ‘Run as administrator’ as shown below. Then Windows command prompt will be displayed.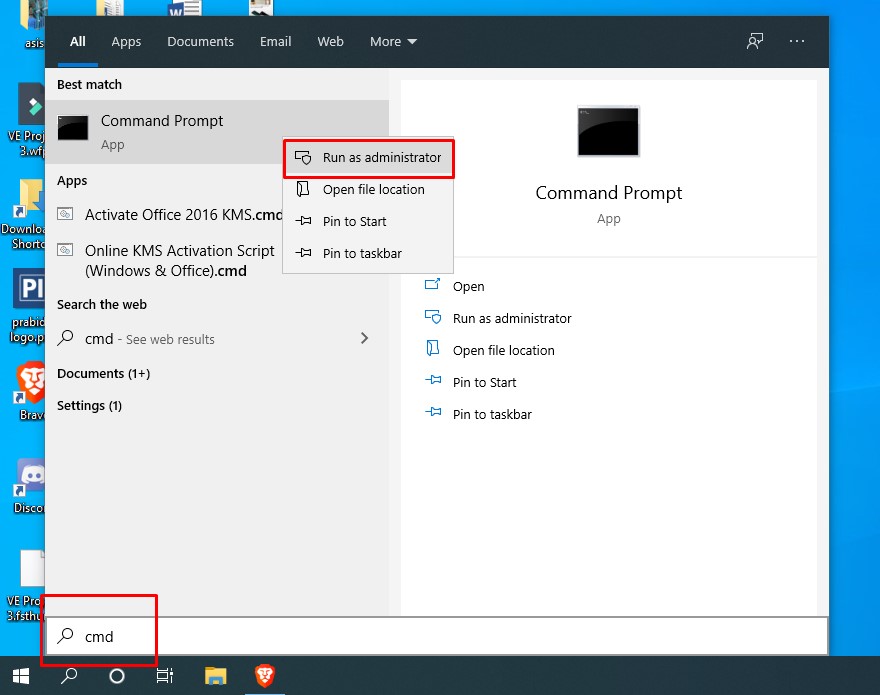
STEP 2: Type ‘diskpart’ and press enter. This will open a new command prompt window. On this command prompt, type ‘list volume’. This will list all the volumes of your devices with details.

STEP 3: From the list of volume, hide the one you want to hide. Here, we will hide volume 2. So type ‘select volume 2’. Instead of 2, you can write the volume you want to hide and press enter.
STEP 4: From the list volume, you can see the ‘Ltr’ of each drive. For volume 2 the Ltr is D. Type ‘remove letter G’ and press enter.

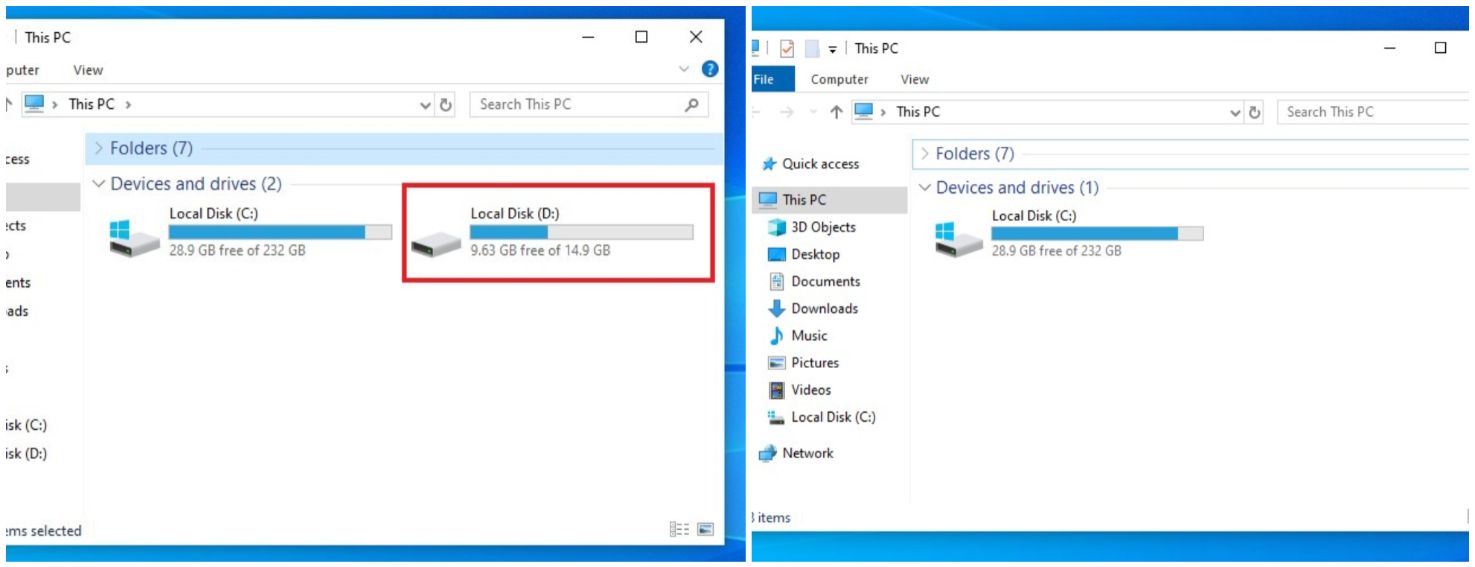
That’s it. You have successfully hidden the drive. The drive is missing from File explorer as well. The shortcut key for file explorer is ‘Win (flag icon) + e’.
If you want to learn more shortcut keys, read the following:
- 50 Common Computer Keyboard Shortcut Keys
- 35 Most Useful Microsoft Excel Keyboard Shortcut & Tips
- Top 25 Most Useful MS-Word Keyboard Shortcuts
How to Unhide Drive using Cmd?
STEP 1: Press the Windows (flag) key or click on start menu and type ‘cmd’. Right-click on command prompt and select ‘Run as administrator’ as shown below. Then Windows command prompt will be displayed.
STEP 2: Type ‘diskpart’ and press enter. This will open a new command prompt window. On this command prompt, type ‘list volume’. This will list all the volumes of your devices with details.
STEP 3: From the list of volume, hide the one you want to hide. Here, we will hide volume 2. So type ‘select volume 2’. Instead of 2, you can write the volume you want to hide and press enter.

STEP 4: Then type ‘assign letter D’. This will unhide the file.
How to hide Drive using Disk Management (GUI)?
If you don’t want to use cmd, you can hide drive using Disk Management as well. You do not have to type any codes. Follow the steps given below to hide drives using Disk Management.
- Open Disk Management.
There are different steps to open disk management.

Method 1: Right-click on the Start menu and select Disk Management
Method 2: Click on Start and type ‘disk management’ and select ‘Create and format hard disk partitions’
Method 3: Press ‘Win (flag icon) + R’ and type ‘diskmgmt.msc’
- The Disk Management tab consists of all the details of the drives. Right-click on the drive you want to hide and select ‘Change Drive Letter and Paths’ as shown below.
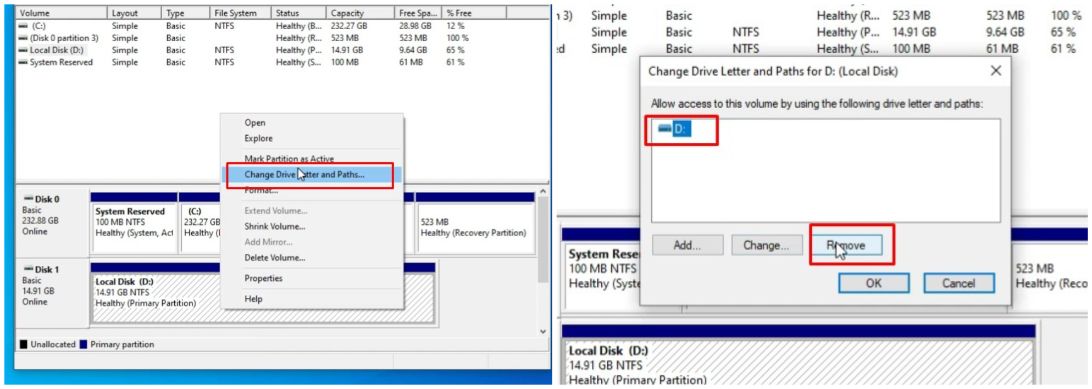
- The following tab will be displayed. Click on remove and tap on ok. This will hide the drive.
How to unhide Drive using Disk Management (GUI)?
- Open Disk Management.
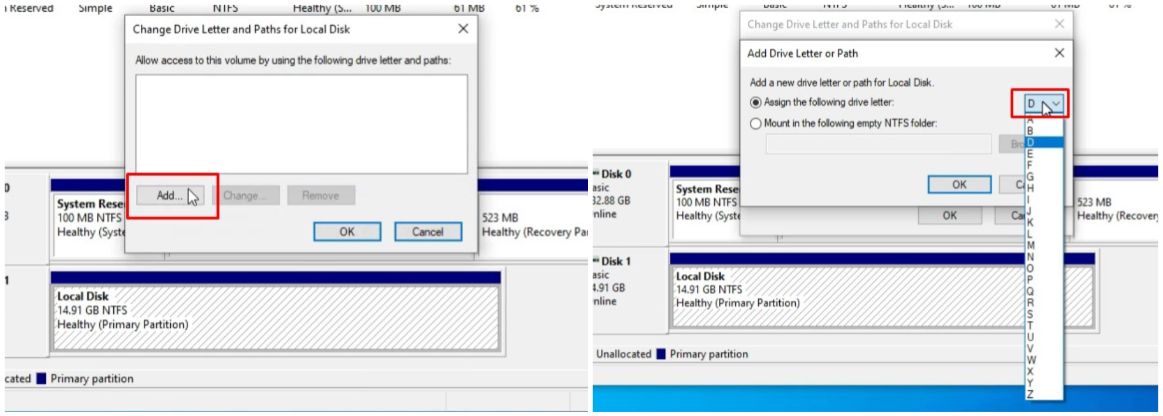
- The Disk Management tab consists of all the details of the drives. Right-click on the drive you want to hide and select ‘Change Drive Letter and Paths’.
- Tap on ‘Add’ then select the drive letter and click on ok as shown below.
You might like:
- 5 Best Free New Games to Play in 2020 for Android [Budget Phones]
- Citizen Mobile App, a government app to provide services via smartphones in Nepal
- Black Shark 3 could launch in February 2020 with 16GB RAM, 47000mAh battery, 40W Fast Charging
- Realme C2s launched with 4000mAh battery and 3GB RAM
More on Tutorials:
- Make your screenshots better by adding device frames to it
- Get your productivity on-the-go by enabling Google Docs Offline
- Get smooth game-play, turn on ‘Game Mode’ in Windows 10
- How to use Gmail offline without any additional software?
- How to register Nepal Engineering Council (NEC) form online? [Full Guide]
- How to recover NTC recharge card Pin Number?