The cumulative updates on Windows 10 have both positive and negative sides. The security patch and related updates are a basic requirement for the system but sometimes the Windows updates can cause the device lag. This is a common problem that everyone is facing after certain updates. But no need to panic there are different ways to save your Windows. Previously we covered the methods to permanently stop the Windows 10 update. This option was helpful to many users. But there’s one more way rather than permanently stopping the Windows update- creating a schedule system restore point. Using a system restore you can restore the system easily if your device is lagging or if there are any issues after the Windows update.
How to enable system restore point service?
To create a schedule system restore point first you must enable system restore point service. Follow the given instructions to enable system restore point,
- Click on Windows (flag) icon and type ‘Create a restore point’. Select the option as shown.
- Under ‘Protection Settings’ if the device system has ‘Protection’ set to ‘off’ the click on the ‘Configure’ button.
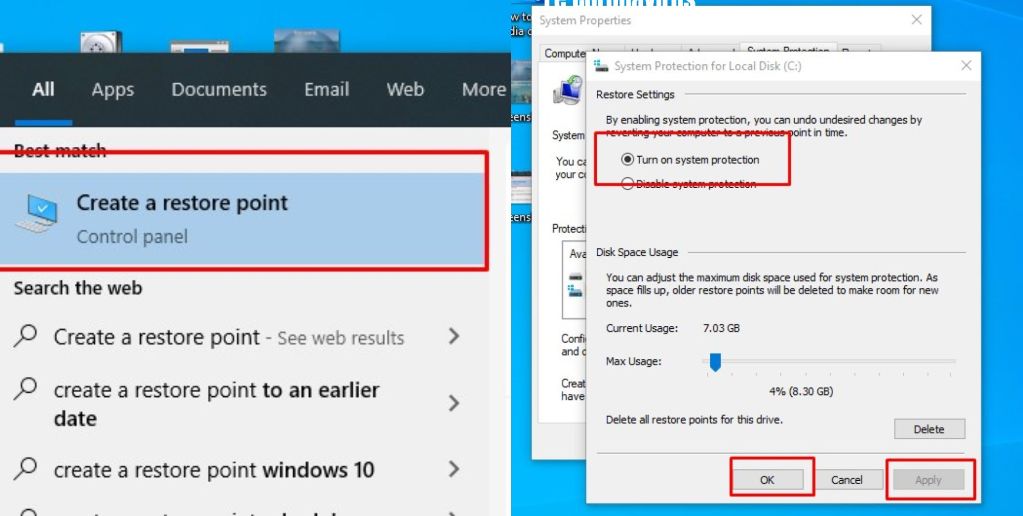
- Select ‘Turn on system protection’. Click Apply then OK.
- Now the system restore point on your device is turned on.
How to create a Schedule System Restore Point on Windows 10?
When you successfully enable the system restore point on your device, now you can create a schedule system restore point. Follow the instructions given below to do so,
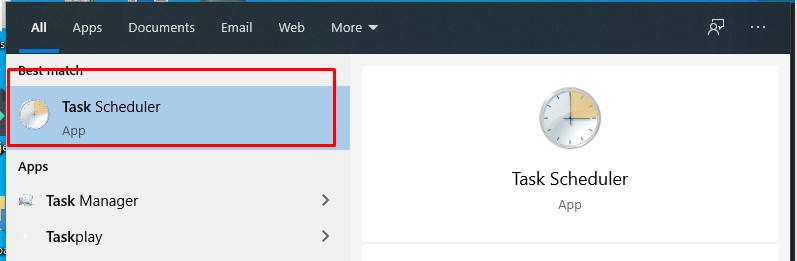
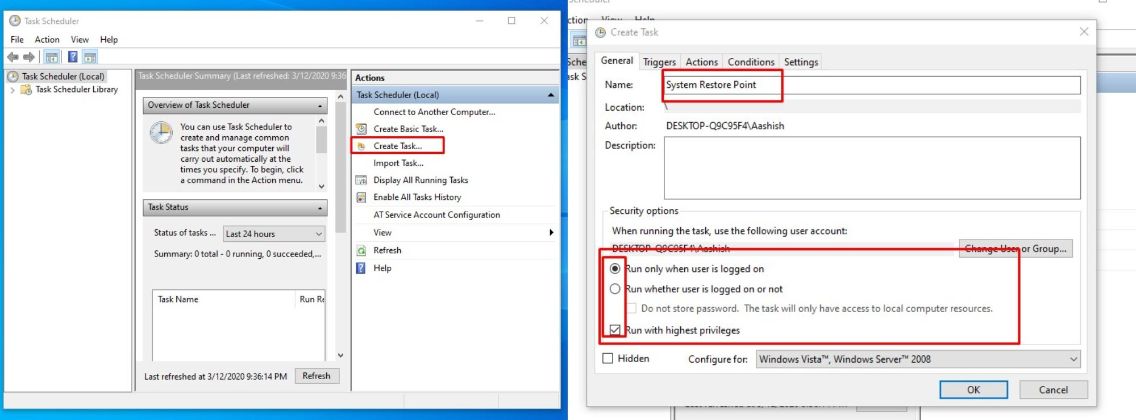
- Click on Windows (flag) icon and type ‘Task Scheduler’. Select the option and run as an administrator as shown.
- On the Task Scheduler. You can see the ‘Create Task’ option on the right side as shown. Tap on it.
- Create Task Windows will appear. Name the task as you want under the General tab. Select the following options as shown.
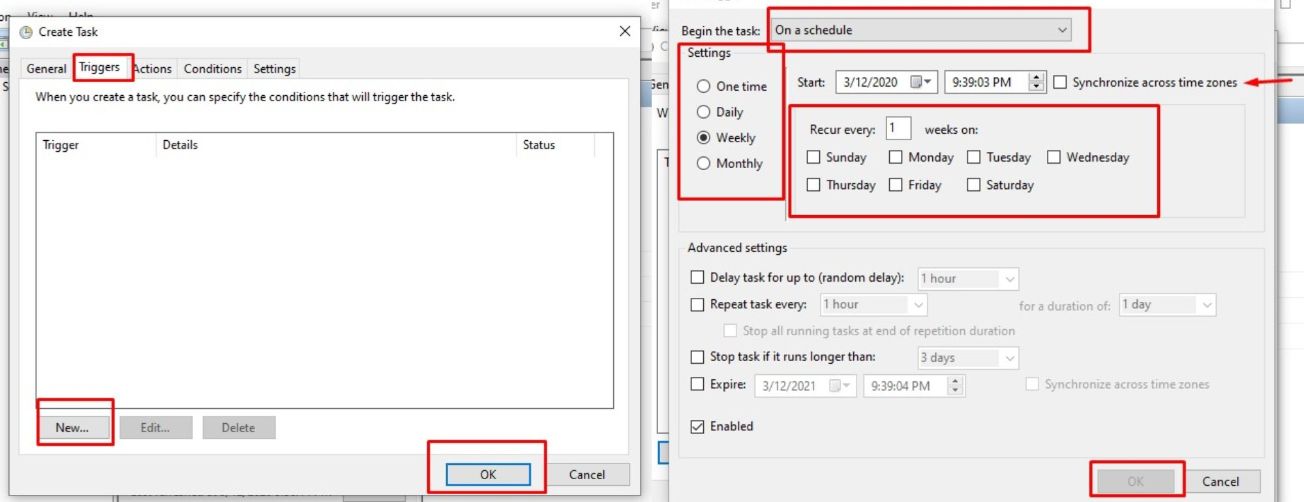
- Move to the Triggers tab. Click on the ‘New’ button. Here select the start date of the restore point (Begin the task) and other date settings as well (Occurrence, Recur date).
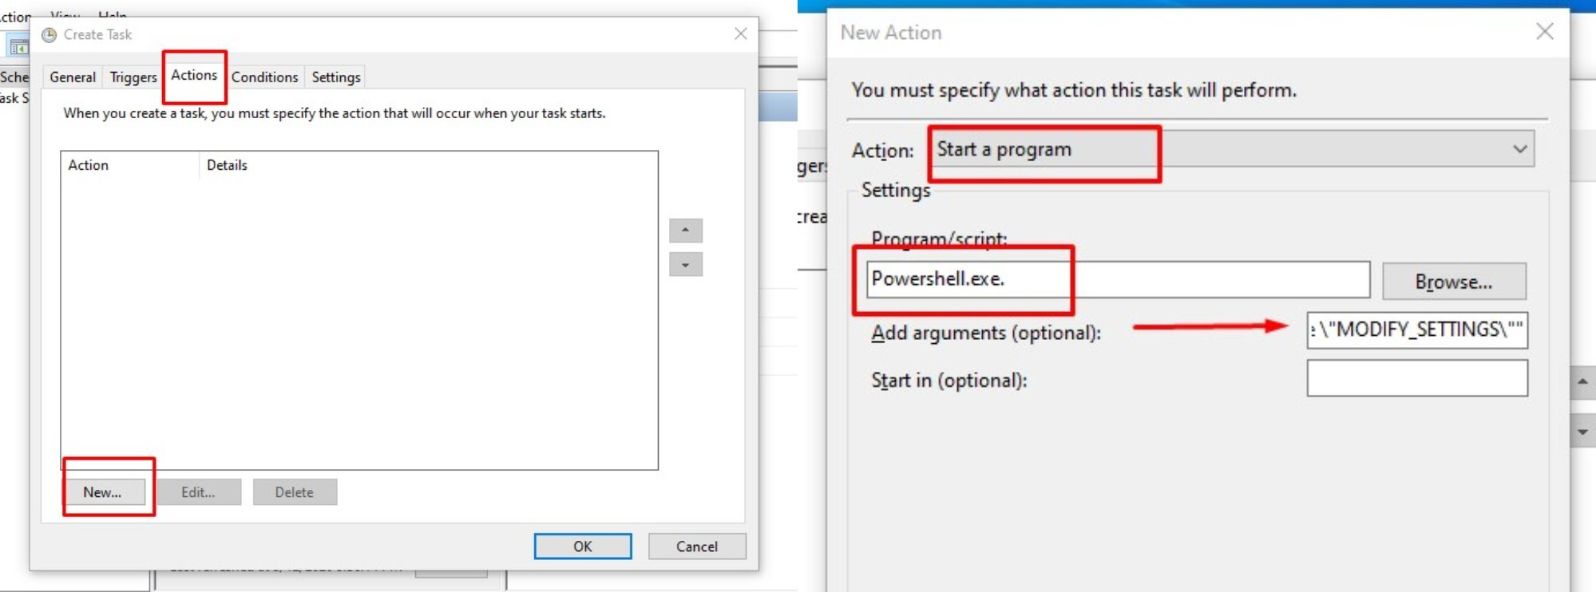
- Afterward, head to ‘Action tab’ where you have to click on the New button. Use ‘Actions’ drop-down menu, select ‘Start a program option.
- In the ‘Program /script’, type the following command- Powershell.exe.
- Add the following argument under ‘Add arguments (optional)’.
-ExecutionPolicy Bypass -Command "Checkpoint-Computer -Description \"My Restore Point Startup\" -RestorePointType \"MODIFY_SETTINGS\"".
- Tap on the OK button.
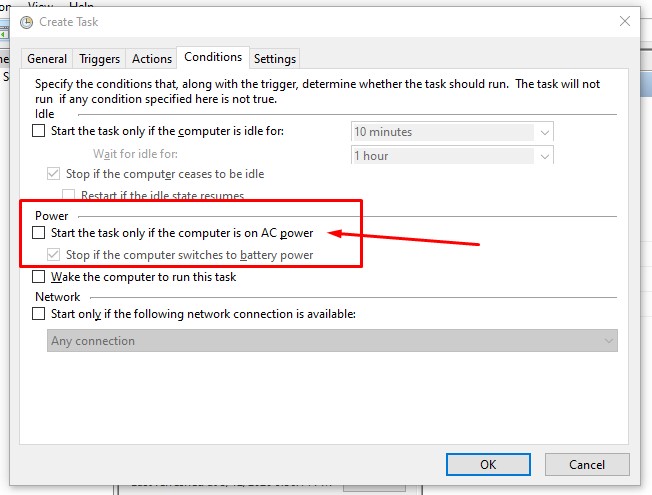
- Now move towards ‘Conditions tab’. Under this tab, you have to uncheck ‘Start the task only if the computer is on AC power”. This makes sure that the task runs even when you are running on battery, like laptops.’
- Click on the Ok button.
- Now you will be asked to enter the administrator password. Enter the password and hit Ok.
That’s it you’re done. At some point, if you like to cancel this task scheduler you can simply delete it as Task Scheduler Library> Task> Delete.
Up next:
- Apple decides to cancel the March 31 event, iPhone SE 2 launch delayed
- OnePlus 8 series to come with 5G support, CEO Pete Lau confirms
- Samsung to announce its mid-range device- Galaxy M21 by the end of March
- Now you can install Android on iPhone 7 and iPhone 7 Plus
- Alibaba creates an AI-powered Diagnosis System to detect Coronavirus
More on Tutorials:
- Increase the media functionality by adding Media Controls on Taskbar
- View Real-time Internet speed (Upload & Download) on Windows Taskbar
- Here’s how you can increase Windows 10 Taskbar transparency to 100%
- Get a list of Installed Applications on your Windows without any third-party software
- Now you can stop Windows 10 update permanently to prevent system lag
- Install dual WhatsApp on your Android with in-built system settings
- How to play Minecraft on your browser for free?
- How to install the same app multiple times on any Android without root?
- Find Wi-Fi Password of all connected networks on Windows 10 using CMD